Please follow us on Telegram to be sure to receive our latest posts!
 Photo © WimL – Fotolia.com (under license)
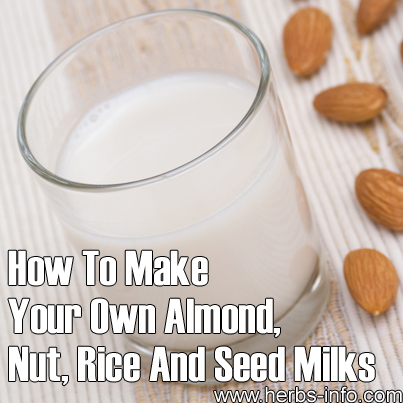
Making your own nut / seed / almond / rice milk is a great way to keep healthy and avoid the costs of store-bought versions. While some people are under the impression that a diy version is time-consuming and would require expensive equipment, the truth is that any old blender or food processor does the trick. What’s more, homemade nut milks are fresher and more nutritious. When soaked, nuts (especially almonds and walnuts) provide increased enzyme activity–resulting in better digestion and absorption of nutrients. Soaking nuts before use in recipes such as nut milk will initiate the sprouting process, after which nutrients and beneficial enzymes are readably available. Your gut, your taste buds, and your wallet will be all the more satisfied when you make the switch from store-bought to diy.
As for time, that depends on the level of expertise you are looking to achieve. Basically, you can make a simple and delicious nut milk from pre-soaked nuts in under 30 minutes! However, the quality and consistency of your product will improve with practice and persistence.
You will need:
1 cup raw almonds or your nut of choice
5 1/2 cups filtered water (2 for soaking the nuts, 3 1/2 for blending)
3 Mejool or 4 Delget Noor pitted dates OR 1 tsp maple syrup OR 2 stevia packets OR 1/2 tsp pure liquid stevia OR 1/8 tsp pure steviosides (optional, to taste)
3 pieces vanilla bean, thinly sliced crosswise OR 1 tsp vanilla extract OR 2 tsp vanilla bean paste (optional)
1 blender or food processor
1 strainer (sieve or colander)
3-4 pieces of cheesecloth
Step 1:
Soak the nuts overnight or for at least 8 hours. Place the nuts in a measuring cup or other container and make sure they are completely submerged. Add the 2 cups of filtered water, and let sit for at least 8 hours but no longer than 24.
Step 2:
Drain the nuts and place in the blender with the other ingredients.
Step 3:
Blend or puree at a high speed for approximately three minutes or until the mixture appears to have reached a smooth consistency.
Remove any excess you find around the inner perimeter of the blender/food processor. If you desire a thicker nut milk, add 1-2 cups water (adjusted according to preference).
Step 4:
Line your strainer / sieve / colander with the 3-4 pieces of cheesecloth (in layers).
Step 5:
Carefully pour the nut milk mixture from the blender pitcher into a clean measuring cup. Wait patiently as the liquid filters into the measuring cup.
*Note: You may need to periodically remove the nut pulp from the strainer to allow for all of the liquid to filter into the measuring cup.
Step 6:
After all of the liquid appears to have filtered into the measuring cup, proceed to lift up the edges of the cheesecloth and twist them together starting at the top, allowing for any remaining liquid to be squeezed out.
Step 7:
It is optional but recommended to save the nut pulp for use in recipes that call for a “meaty” or chunky texture. Nut burgers, vegetarian meat loaf, and homemade falafel are examples.
Step 8:
Pour the nut milk into a jar or other clean receptacle and refrigerate immediately, or enjoy the fruits of your effort right away!
You may expect to discover a considerable amount of separation the following day. Should this be the case, simply shake the jar or stir its contents. Note that fresh/homemade nut milk will not last as long as store-bought. Refrigerate and consume witin 1-2 days.
Enjoy in any recipe that calls for soy, hemp, rice, coconut or dairy milk. 🙂
Making Rice Milk
Making rice milk is similar. In place of the first and second step, you need to either cook the rice or soak it overnight. Steps 3-8 are the same. Wash the rice before use.
Making Oat Milk
For oat milk, steps 1 and 2 are the same as for rice milk.
Making Peanut Milk
For peanut milk, I use natural peanut butter (the kind you grind yourself at Whole Foods Market or other natural food stores and/or in the natural foods aisle of Raleys, etc.)
Making Seed Milks
For variety, try using hemp seeds, sunflower seeds, or sesame seeds. If you are budget-conscious, sunflower seeds are the most cost-effective option. Rich in linoleic acid (an essential fatty acid) and amino acids such as tryptophan, sunflower seeds are also a great source of vitamin E and B vitamins–all of which are good for the brain.
Hemp seeds are considered a superfood, meaning that they contain a full spectrum of essential amino acids and essential fatty acids. While not as economical as sunflower seeds, hemp seeds might be one of those things that are worth the “splurge”. Another option is to use sunflower seeds as a base and add a modest amount of hemp seeds, or replace 1/2 the sunflower seeds with an equal amount of hemp seeds.
For seed milks, follow the nut milk recipe – but only soak the seeds for 8 to 12 hours, as the sprouting process is quicker for seeds.
Will These Recipes Save Money?
They have the potential to save money – but it depends to an extent on how thick and creamy you like the milks i.e. how much water you add. Hazelnuts are expensive and your savings there may be small – but rice milk should save some money!
Article created by Kelsey Wambold of www.paleoveganista.com
😳 What Tinnitus Does To Your Brain Cells (And How To Stop It)
After 47 years of studies and countless brain scans done on more than 2,400 tinnitus patients, scientists at the MIT Institute found that in a shocking 96% of cases, tinnitus was actually shrinking their brain cells.
As it turns out, tinnitus and brain health are strongly linked.
Even more interesting: The reason why top army officials are not deaf after decades of hearing machine guns, bombs going off and helicopter noises…
Is because they are using something called "the wire method", a simple protocol inspired by a classified surgery on deaf people from the 1950s...
★ How To Get Rid Of Nail Fungus:
★ Does Your Salad Contain This Vegetable?
★ 20 Natural Painkillers In Your Kitchen (Video):
★ Men's Prostate Health:

2. Famous Chef Sheds 60lbs Researching New Paleo Recipes: Get The Cookbook FREE Here
3. #1 muscle that eliminates joint and back pain, anxiety and looking fat
4. 7 odd foods that KILL your abdominal fat (surprising fat-fighters)
5. The TRUTH about bread (Will surprise you!)
6. [PROOF] Reverse Diabetes with a "Pancreas Jumpstart"
7. Here's What Happens When You "Unlock Your Hip Flexors"
8. The #1 WORST food that CAUSES Faster Aging (beware -- Are you eating this?)
The #1 Muscle That Eliminates Joint And Back Pain, Anxiety And Looking Fat
By Mike Westerdal CPT
Can you guess which muscle in your body is the #1 muscle that eliminates joint and back pain, anxiety and looking fat?
This is especially important if you spend a significant amount of time sitting every day (I do, and this really affects me in a big way!)
Working this "hidden survival muscle" that most people are simply not training because no-one ever taught them how will boost your body shape, energy levels, immune system, sexual function, strength and athletic performance when unlocked.
If this "hidden" most powerful primal muscle is healthy, we are healthy.
Is it...
a) Abs
b) Chest
c) Glutes
d) Hip Flexors
Take the quiz above and see if you got the correct answer!
P.S. Make sure you check out this page to get to know the 10 simple moves that will bring vitality back into your life:
If you enjoyed this page:


I do this but want to know how long the pulp will keep.
What’s up, the whole thing is going nicely here and ofcourse
every one is sharing data, that’s really fine, keep up writing.
You can put the pulp onto a baking sheet or in a dehydrator and dry it out and use it where almond meal or flours (oat, rice etc.) are used. Once it’s dried put into storage container or bag and freeze to keep indefinitely. This is great for those who are gluten and dairy free as there will be no waste. If you’re not into using the flours then at the very least add to compost pile and not the trash.